How To – GPS Track Logs and EveryTrail.com
February 18, 2011
January 2021 note: EveryTrail.com has been replaced by AllTrails.com. Similar steps follow.
Lone Star BMW Riders is hosting a GPS class this weekend for club members interested in expanding their knowledge of GPS use for motorcycling. I have had some folks ask me how I incorporate my journeys’ GPS track logs into my blog site, and how to attach photos taken along the way to tracks. I’m not going to be able to make it to this weekend’s class due to business travel. And even if I could, I don’t think there would be time to work in any of what I have to talk about with all of the content I have seen so far in the presentation that the other skilled club class instructors have to offer. So, follow along with the eight semi-simple steps I use to offload my ride tracks, and manipulate them for presentation in the blog.
http://everytrail.com AllTrails.com is an excellent site that can be used to document journeys through different methods, one of which is uploading track logs from my GPS. I use Garmin GPS units, so my steps are specific to the software that Garmin provides. But, no matter what software your GPS uses, once you get your track log file in a .gpx format, it can then be used with Everytrail.
Step Numero Uno:
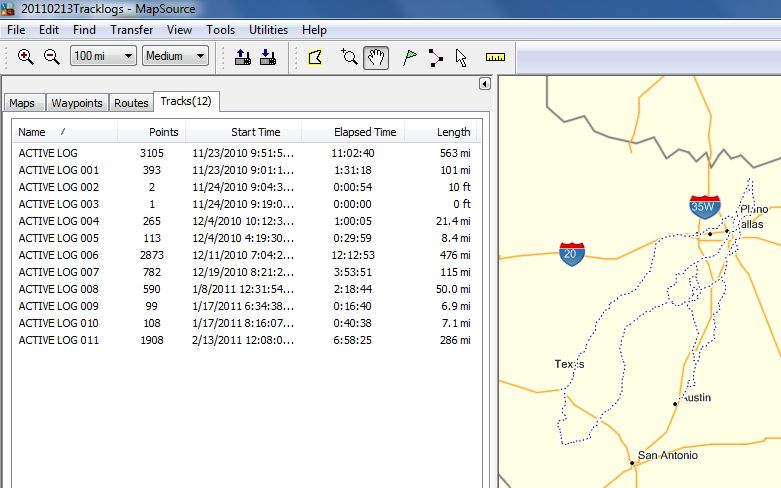
Download your track log from the GPS to your MapSource mapping software and save it in a known location on your computer in a Garmin-specific format (.gdb). I recommend prefixing your file name with a numeric format of the date, i.e. 20110213Tracklogs.gdb. I believe you may find that using this format on file names and folders will enable sorting and finding them in the future much easier.
Step Numero Dos:
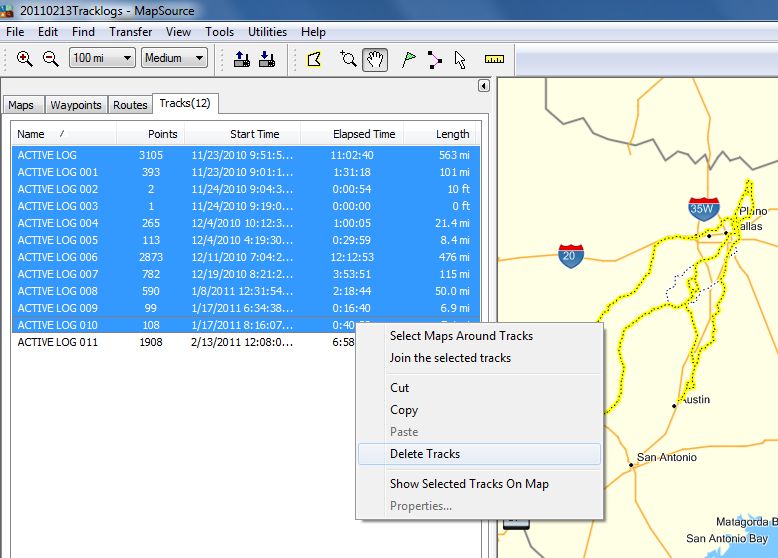
Remove track logs not important to the journey by ctrl-clicking or shift-clicking multiple track logs and right-clicking to delete them.

Step Numero Tres:
Merge your track logs for each day together (if they are split within a single day) by highlighting them, and then right-clicking and selecting “Join the selected tracks”. I like to rename the track log in the same format I recommended for files, i.e. yyyymmdd-description. When you have multiple days for your total journey you wish to tell, you can choose to keep the individual days separate in your track log file.
Step Numero Quatro:
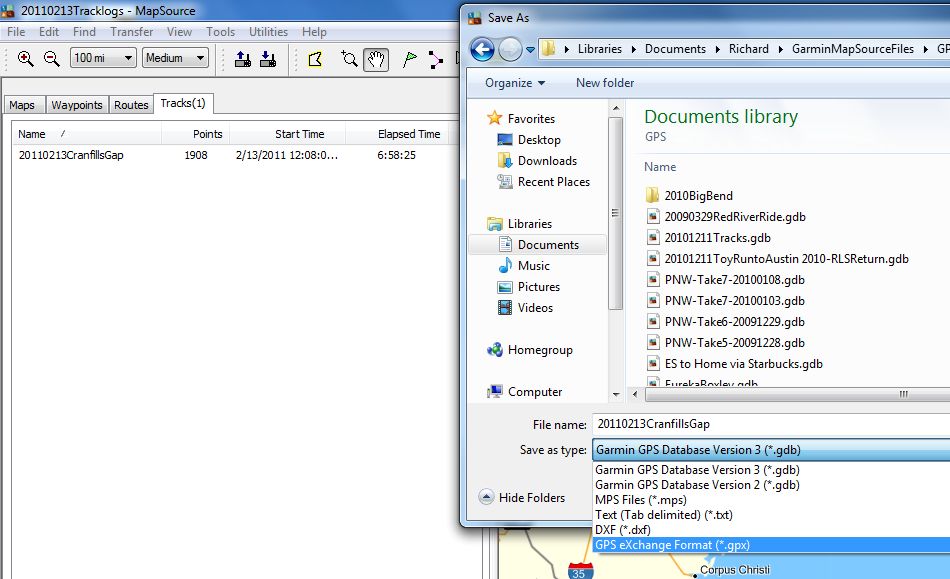
Save your journey-specific Garmin track log file as a .gpx format, which is a universal file exchange fomat used for many different software applications. I chose GPS eXchange Format (*.gpx) and named this trip 20110213CranfillsGap.
Step Numero Cinco:
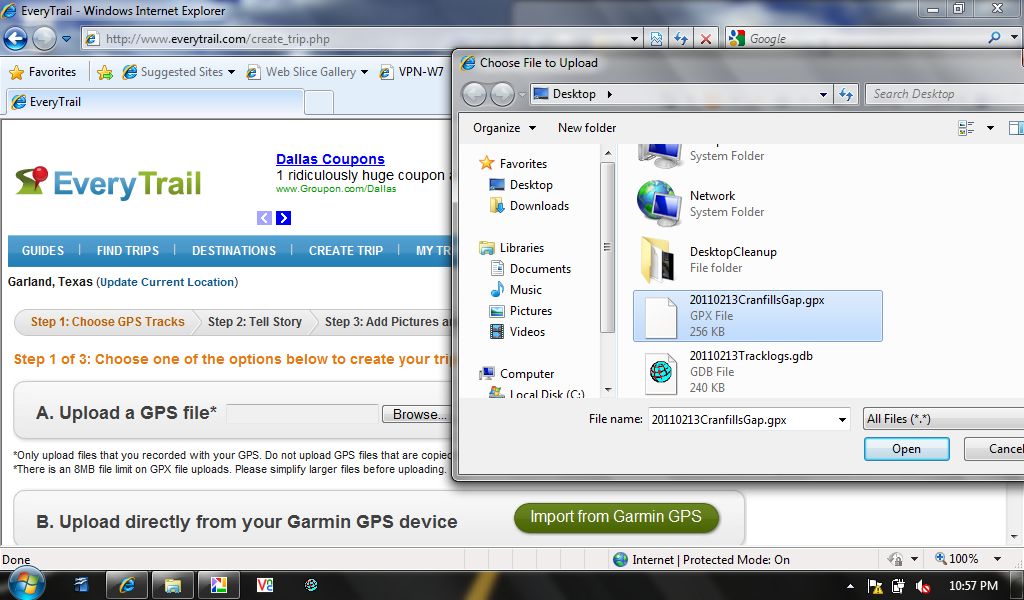
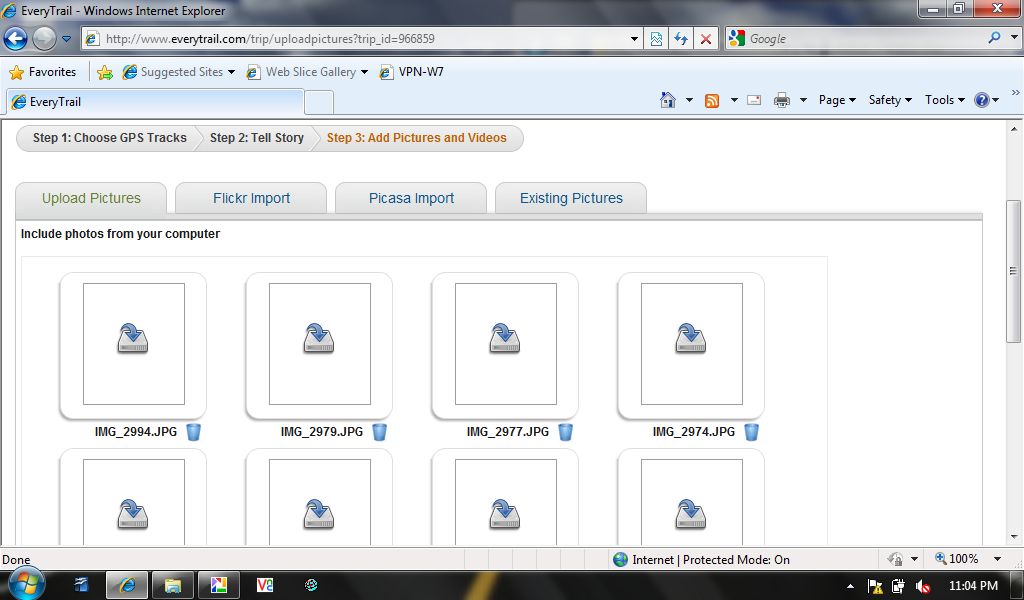
Go to Everytrail.com, create a user account, and select “Create Trip” from the menu. Locate the “Upload a GPS File, click the “Browse” button to locate your trip’s .gpx track log file on your computer’s drive, and click the “Upload File” button.
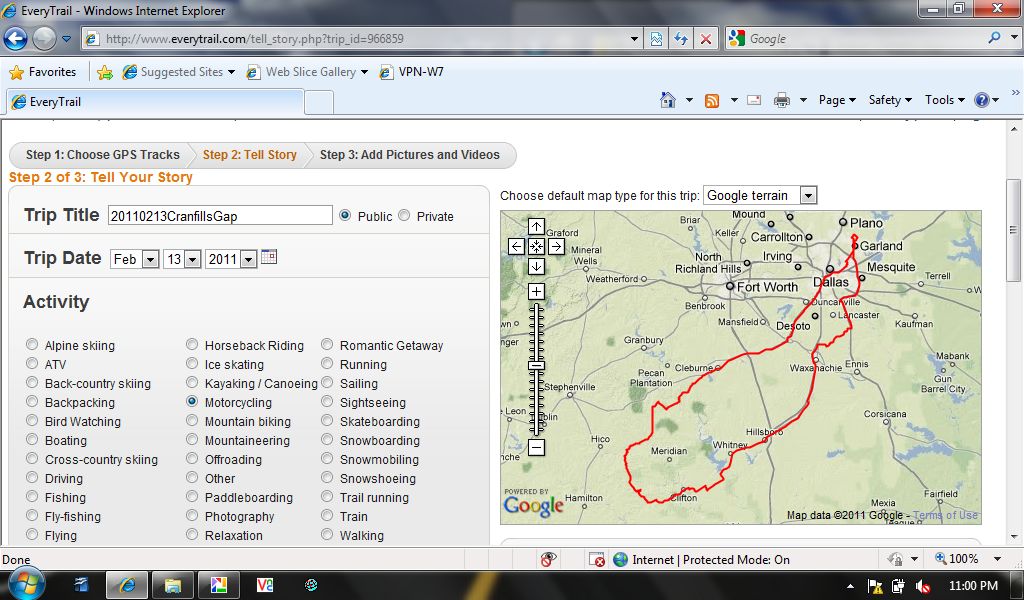
Step Numero Seis:
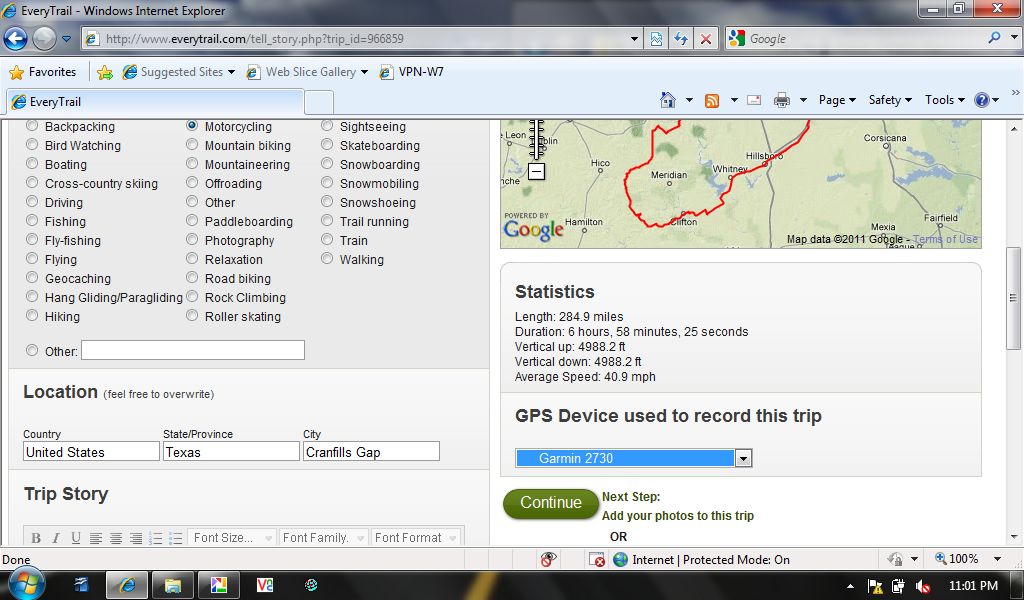
After you have uploaded the.gpx file, you have now created a nice track on a GoogleMap that can be zoomed in and manipulated as you wish. Describe and save your journey for future reference, and to embed in other web sites, such as a blog. These saved journeys can be downloaded and transferred into a GPS for a “bread crumb” approach to follow on the GPS, or can be used as a template track to create a new route in your mapping software.
Optional Step Numero Siete:
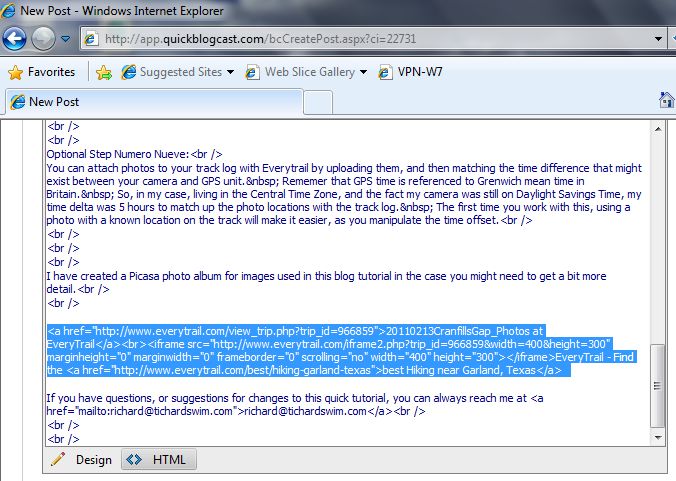
You can stop right here and just use Everytrail.com to look at your journey, or decide to go further and embed the track in other sites. Locate the “Share This Trip” section, click the “flash map…” or “non-flash map…” fields and copy the html code, and paste into your web site or blog.
Optional Step Numero Ocho:
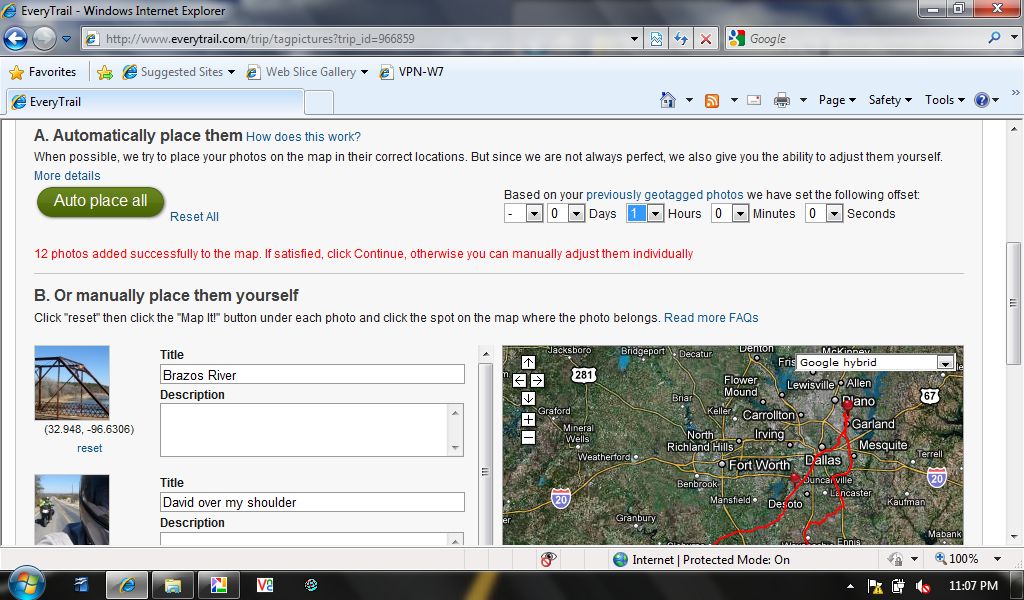
You can attach photos to your track log with Everytrail AllTrails by uploading them, and then you may lay them on top of your new track log.

Mas Optional Step Numero Ocho:
You will need to work with the time offset that will likely exist between your camera and
GPS unit. Remember that GPS time is referenced to Greenwich mean time in
Britain. So, in my case, living in the Central Time Zone, and the fact
my camera was still on Daylight Savings Time, my time delta was 5 hours
to match up the photo locations with the track log. The first time you
work with this, using a photo with a known location on the track will
make it easier, as you manipulate the time offset. What’s real neat about this geotagging of photos, is you can figure out where the heck a certain photo was taken. Case in the photo caption of “Uhhh…” – I was later able to figure out the photo was done in the small town of Iredell after I zoomed in on the map with the geo-placed photos .
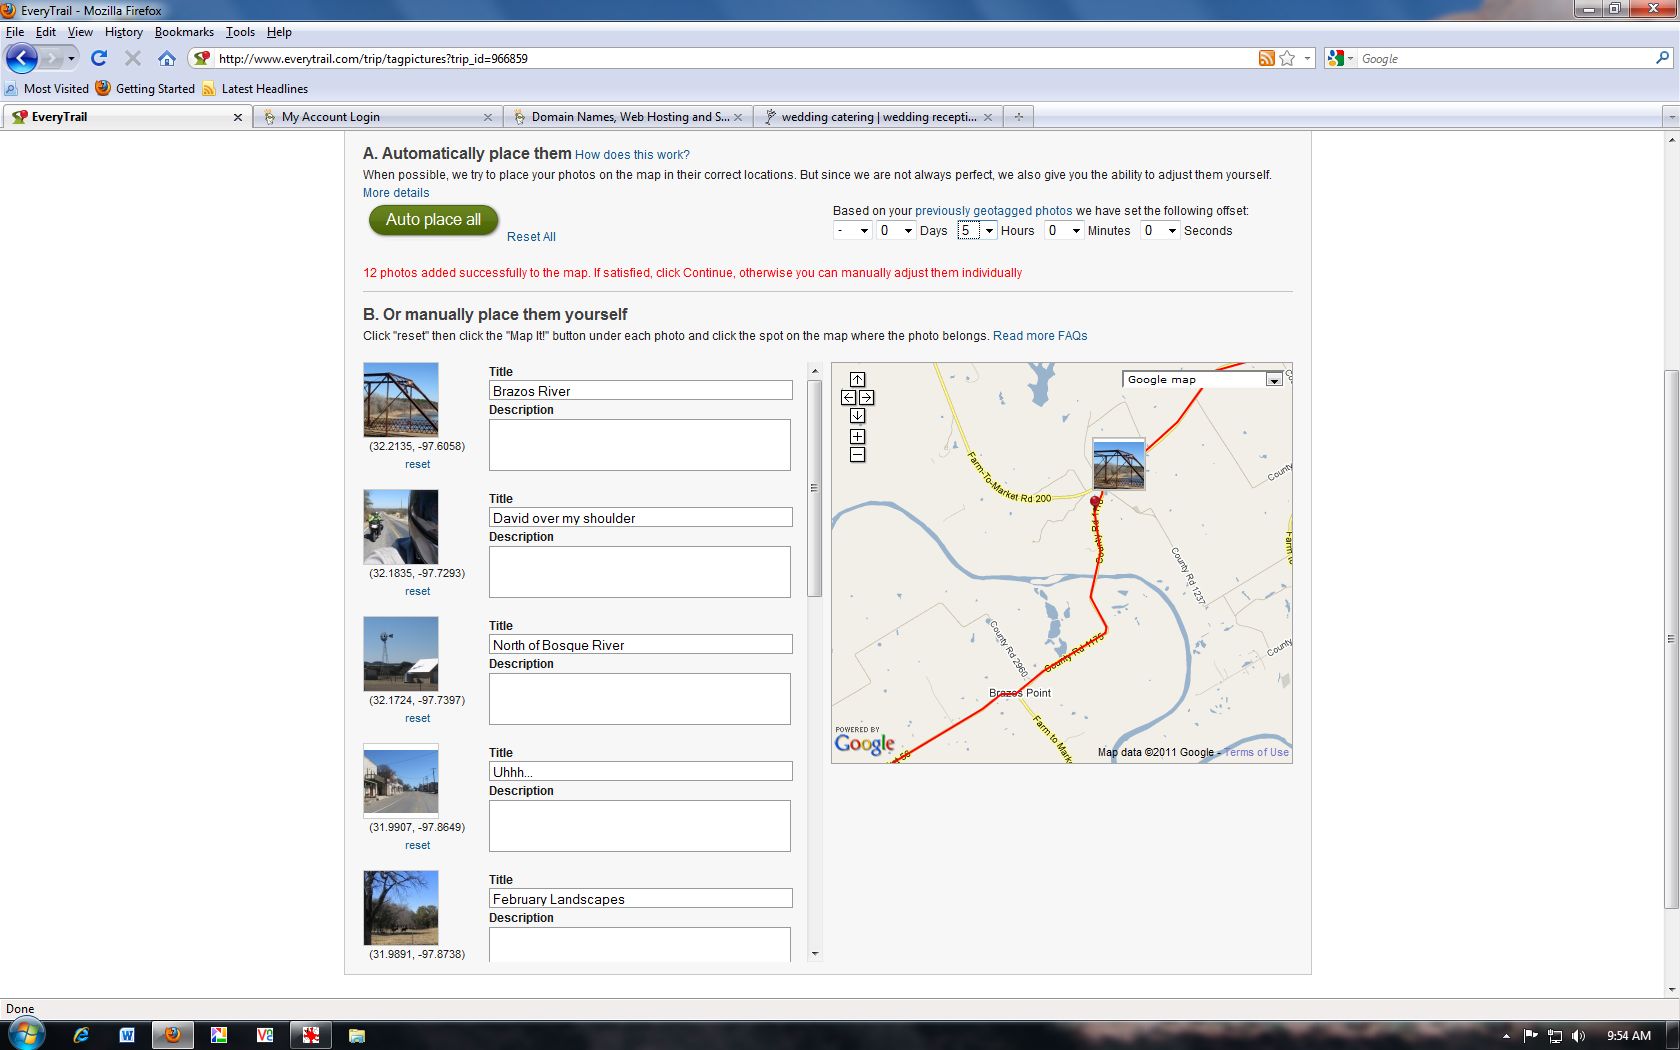
Here’s a zoom in for the first geo-placed image of the old bridge across the Brazos River.
I have created an album for images used in this blog tutorial in the case you might need to get a bit more detail.